 One of the benefits of a CMS is the ability to store, organize, and reuse assets like images or documents.
When an editor uploads a new image or file to Umbraco, they must specify the folder in the Umbraco Media Section they would like to store it in.
Each site (program, centre, institute, etc.) has their own folder in the Media section. You may only see or have access to one of these folders. However, as an editor, you control all of the folders and files within the folder for your site.
Our recommendation is to use at least two folders. You will likely want many more.
- An Images folder which contains specific picture files (.jpg, .png, .bmp, etc).
- A Documents or PDF folder which contain specific documents and files related to that folder (.pdf, .docx, .xls, etc).
There are two ways to upload an file in Umbraco:
- Through the Media Section before you insert the file or image on to a page
- Through the Media Menu at the point in time when you insert a file or image
Through the media section
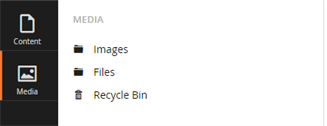
To upload through the Media section, ensure you have clicked on the Media button in the Navigation Menu so that the Media section appears.
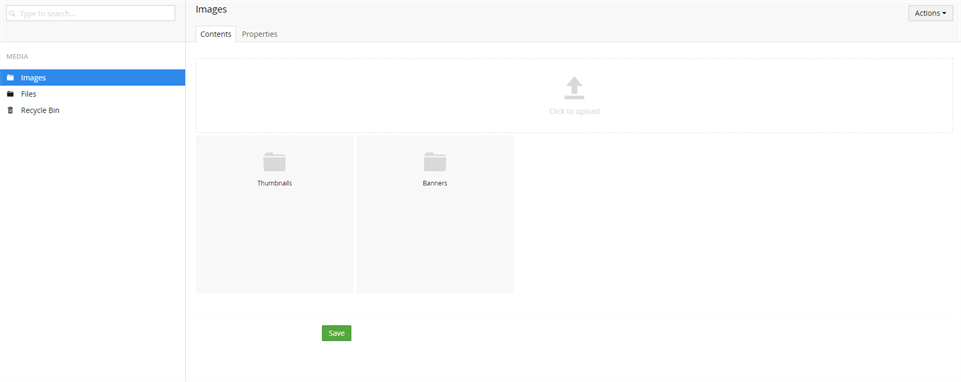
Click through to the desired folder you would like to upload your file. The Content Directory of Umbraco will display the available folders.

Clicking on any one of the sub-folders will take you deeper into the folder structure, to help find the correct location to upload the file. Once you have found the appropriate folder to upload the file into, select the upload icon and follow the instructions on the screen.
Through the media menu
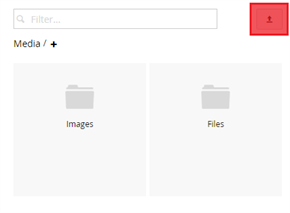
 You can also upload a file from the Media Menu when inserting media into the content editor section.
Once you select the “Media Picker” option and open the Media Menu, locate the area where you would like to upload the file. Once you have found the correct folder you would like to upload the file to, select the upload icon in the top right hand corner and upload the file to Umbraco.